All You Need To Know About Installing Gravel Grid
Laying a gravel grid under your gravel will help to keep it in place and is especially useful if your drive or garden is on a slope. You can buy the gravel grid from us as an addition to your order of decorative aggregates.
Our ground reinforcement grid is Eco friendly as is made from 100% recycled plastic. It is suitable for use on drives, paths, car parks or access roads, anywhere really that will be walked or driven on. It has also been tested to withstand the weight of 428 tonnes per m² and is fully SUD’s compliant so water will drain through.

Our gravel grid is easy to install and in order to help you use it, we have put together this step by step guide.
Step 1: Create a base
Before installing your gravel driveway grid, ensure you have a smooth and solid base for it to be put onto. We suggest compacting MOT type 1 or similar to a depth of at least 100mm. However you can lay the gravel stabilisation grid directly onto soil, grass or any other permeable surface.
We do recommend using a weed membrane underneath, as this will help to keep your gravel clean.
Step 2: Putting your gravel grid together
Your plastic driveway grid will arrive in square metres made up of 9 connecting panels. The panels are sized 330mm x 330mm with a height of 40mm.
Each panel interlocks using simple slot and peg snap connections. Once you have laid your panels down and connected them you may find you need to cut some to size. We suggest using an angle grinder, hand or power saw to follow any curve, radius or angle. However to avoid injury, do not use any tools that you are not familiar with.

Additionally we don’t advise you cut tiles to less than half their original size. You can use a light vibrating whacker plate to ensure the grid lies flat if required.
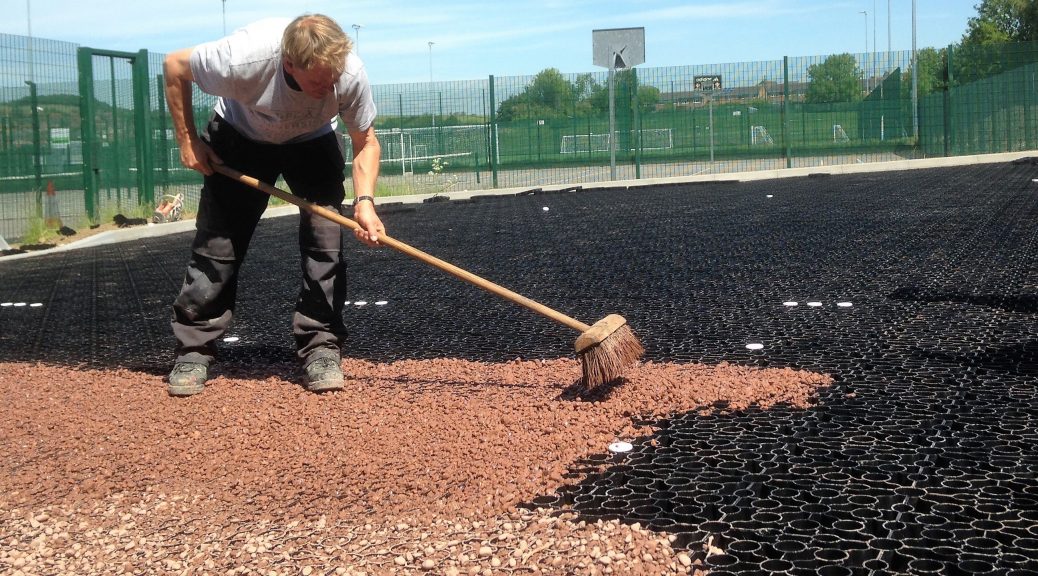
Step 3: Gravel for your grid
You can fill your gravel stabiliser with any decorative aggregate, driveway gravel, stone or chipping that is sized between an 8mm to 20mm. For the best result we suggest washing your material first and avoid using fully rounded stones.
We suggest you cover the grid cells with a 20-35mm deep surface layer of decorative aggregate. This can then be raked into place to ensure an even covering. This layer of gravel will settle to a 10mm-15mm surface layer once it has compacted and naturally settled over a 4-6 week period.

Once you are happy that your surface is compacted and smooth then it is ready to use and enjoy! We hope you have found our guide on installing our environmentally friendly gravel grids.
For more information on this subject, please see our video below on ‘how to install gravel grid’.